ParseHub proxy with LightningBytes
Use LightningBytes proxies with ParseHub for flexible, location-based web scraping
What is ParseHub?
ParseHub is a visual web scraping tool that lets you collect data from websites without writing code. You can create scraping projects by selecting elements on a webpage, defining actions, and running the project on ParseHub's servers.
For projects that require a specific IP location or custom proxy infrastructure, ParseHub supports custom proxies on paid plans. This allows you to connect your own proxy provider and control which proxy addresses are used during your scraping runs.
- Custom proxy configuration
- 30M+ residential IPs pool
- 24/7 expert support
How to use LightningBytes proxies with ParseHub
Follow the steps below to route ParseHub through your LightningBytes residential or mobile proxies.
- 1
Generate your LightningBytes proxy
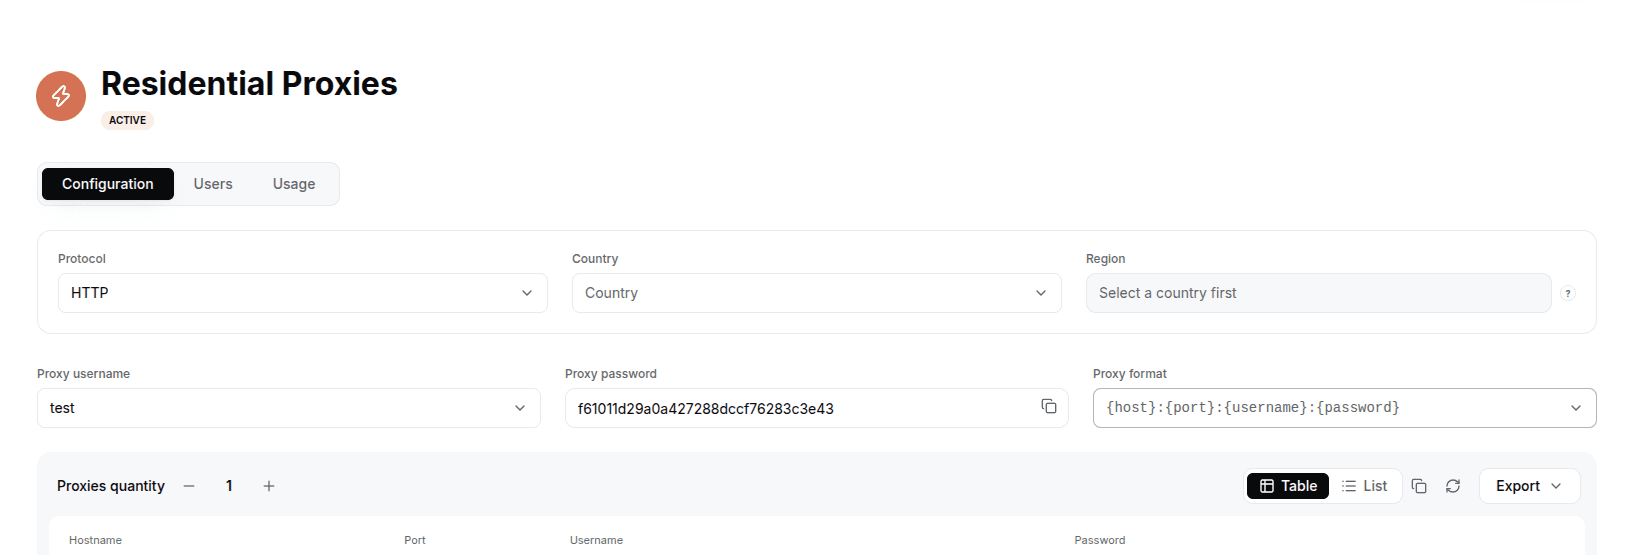
In the LightningBytes dashboard, open your Residential or Mobile proxies page and go to the Configuration tab. Choose the protocol (HTTP or SOCKS5), set the country and region if you need targeting, and select the proxy user. Copy the generated endpoint, host:port:username:password by default, or pick a different format from the Proxy format dropdown. ParseHub expects the IP:Port:Username:Password format, which is the default Proxy format output.
- 2
Open your ParseHub project
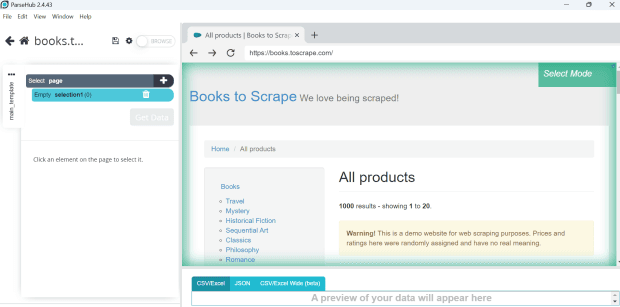
Launch ParseHub and open an existing project or create a new one for the website you want to scrape
- 3
Open Project Settings
Open your ParseHub project and click the Settings icon to access the project configuration.
- 4
Enable IP rotation
In Project Settings, find Rotate IP Addresses and enable the option. The custom proxy field will appear below it.
- 5
Add your LightningBytes proxy
Paste your LightningBytes proxy into the Custom Proxies field using ParseHub's required format:IP:Port:Username:Password
- 6
Save your project
Once you've added your LightningBytes proxy, save the ParseHub project to apply the new configuration
- 7
Run your ParseHub project
Start your ParseHub project to begin collecting data through the configured proxy
- 8
Check your results
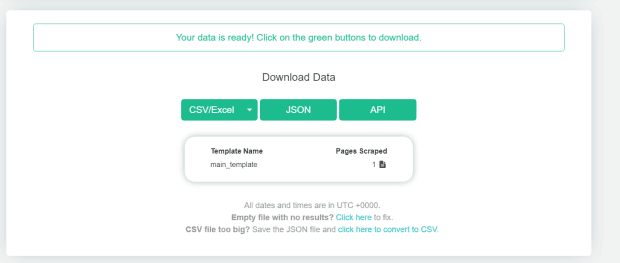
After the run finishes, review the collected data to make sure your ParseHub project is working as expected
Connect ParseHub to clean, filtered IPs
Residential and mobile proxies on pay-as-you-go or subscription plans, HTTP(S) and SOCKS5 on every plan.